How to create an account on article.pk
To unlock the gateway of unlimited knowledge and earn opportunities on article.pk, the most prior thing to do is create an account. Keep in mind that you are not supposed to log in and face the bundle of complexities for reading, commenting, and liking our articles. However, later on, you can subscribe to our newsletter for daily updates about articles and trends.
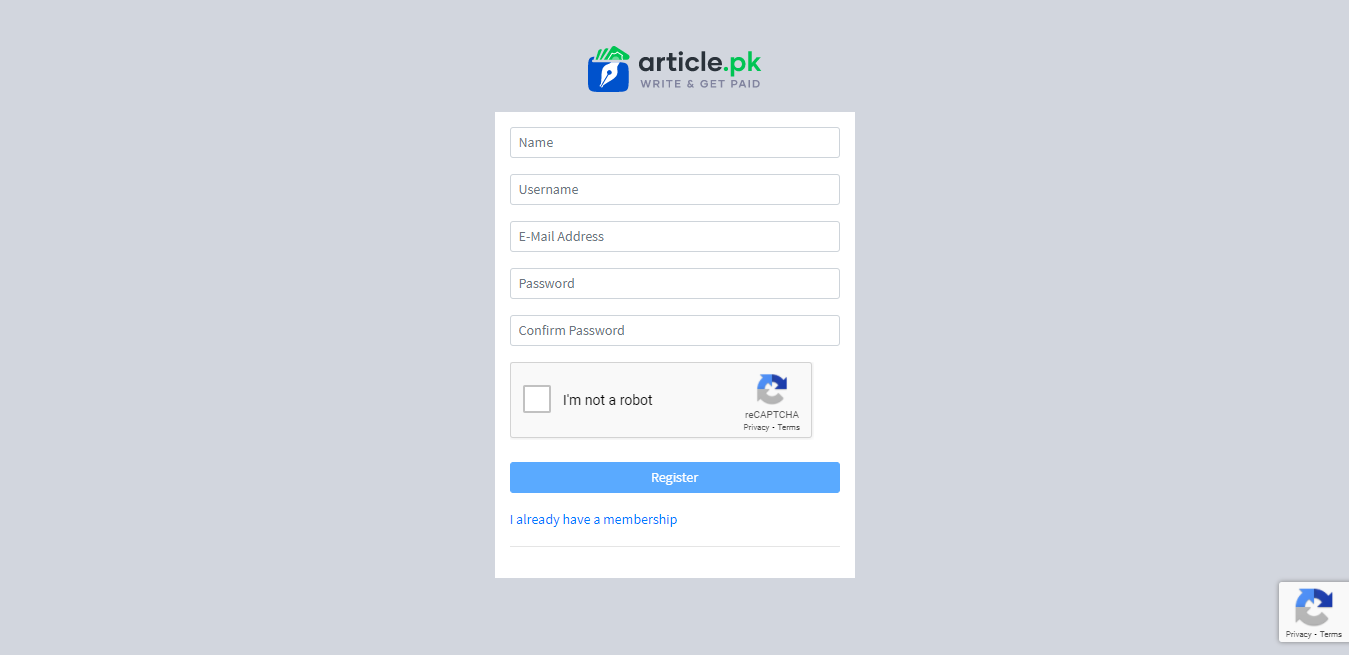
So, the first step is to visit the article.pk and click on the register button. When you click on it, the following window appears in front of you;
There are different rows demanding;
· Your name that you would like to show on your profile. Writing is a professional and most respected profession; thus, keep it professional and follow our terms and conditions.
· The second block shows your username. This won't be displayed on your profile, but your username distinguishes you from a second user having the same name as you. So, keep it unique; our system would also show you suggestions that are not reserved.
· In the third block, you need to enter your email address as it is the most crucial for accessing our services openly. If you don't have one, you can create one from google.
· Now the 4th one asks you to enter a password. This password must be strong as this account handles your dashboard, payment details, and data. By confirming it in the next row, congrats you created your account successfully.
Want to publish your article? Here is how.
Once you have created your account, you will get the following interface type in Infront of you.
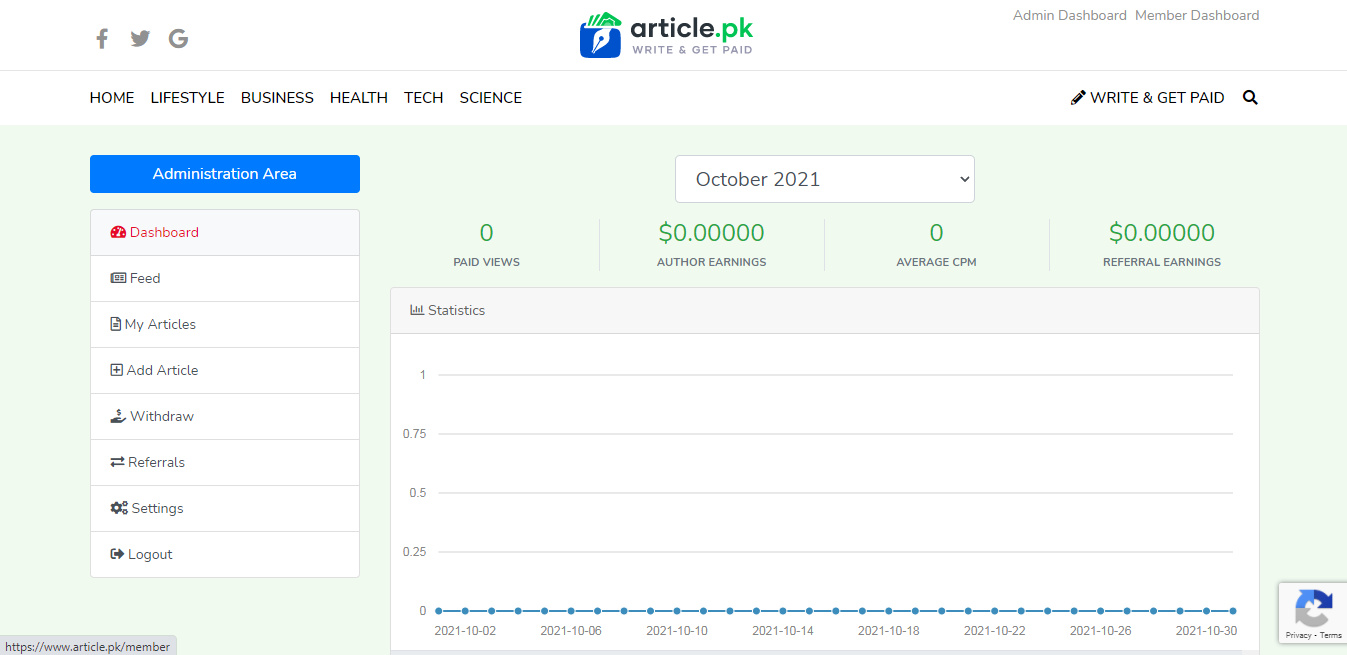
This interface shows your member dashboard with analytics of your articles and the earnings you made from views and referrals.
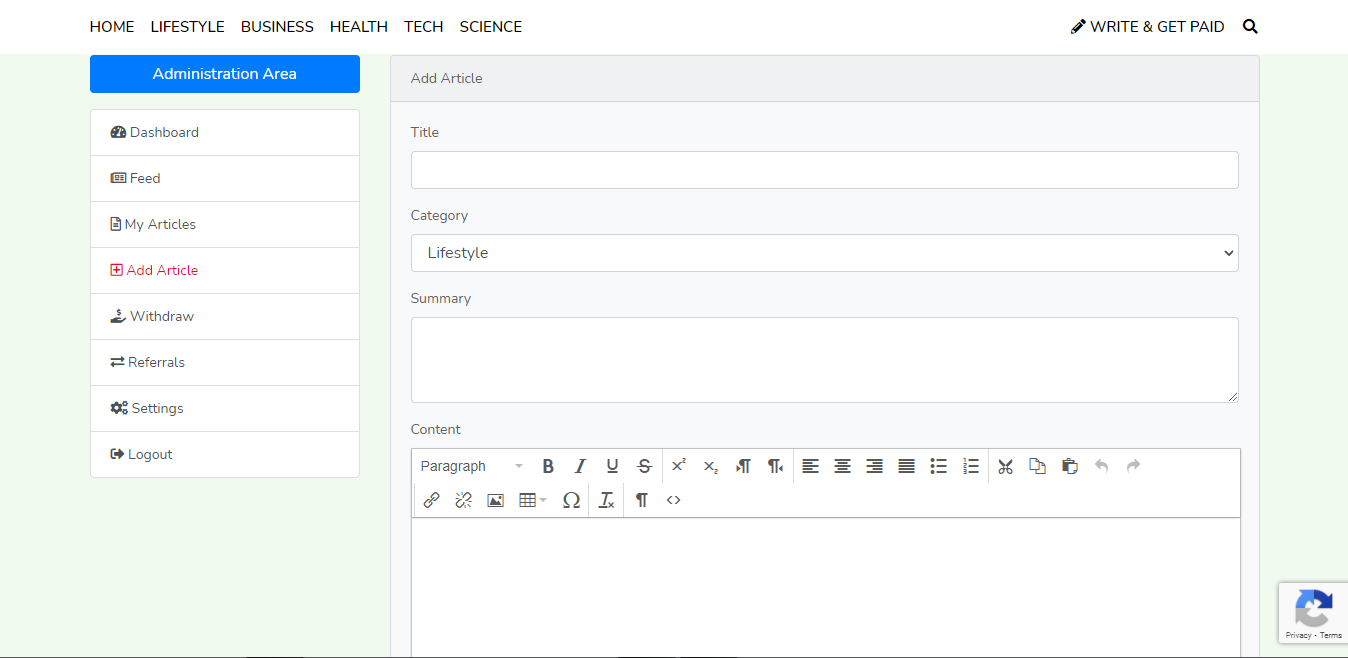
From here, you can see that there is a red-pointing line over add article on the left sidebar. When you click this option, you open up a new page that looks like this;
You can see the word "title" at the top of the first block; here, you are supposed to enter the title of your article. Once you wrote your article title here, you don't need to write it in the content section a second time.
The second category section helps you to choose the most relevant category for your article. Selecting the right category would help you get the right audience.
The third section, "summary", demands to enter an engaging summary or first paragraph of your article. This summary would be shown below the feature image of the article on every category page. Thus, make it short but engaging.
The 4th section, "content", is a box that provides you with complete editing tools and parameters that you can utilize to make your article beautiful. There are different headings, blockquote, and other editing options to make your article entirely perfect while pasting it here. So, use the tools wisely and make them polished for readers.
When you scroll it down, there will be an option to choose a file. This option could be used to add your feature image or thumbnail image that shows on your article title on the home page and category pages.
At the end of this page, there is a dialogue box asking for a message to the reviewer. As we are making it a perfect platform for all ages, we check each of your articles for all stages and then approve or send them back for improvements. So, if you think your article is perfect, enter your message here to guide the reviewer. Likewise, you can use this dialogue box to guide the reviewer if you are entering some terms violating words.
To see your published and backed articles, you can click on my articles. It would show all the actions and messages from reviewers. So, keep checking to make your all articles worthy.
Understanding Member Dashboard
Article.pk is the only website in Pakistan that considers mutual empowerment. We have converted this website progress and the earning system fully transparent with the member dashboard. This dashboard is a complete summary of what's going on with your articles and earnings.
So, without any clicking and options, here is a brief intro of this dashboard;
A left sidebar is a complete approach of all the settings, article lists, article approvals, and many more. So, you can check all the options by clicking over them. Also, you can withdraw money from here by clicking on withdraw.
The right side of this dashboard shows you the details of your combined views overall articles. Next to the paid views, it shows your earnings from these reviews. Paid views are a term that declares that these are authentic views who read your articles rather than giving spammy clicks.
Below this section, there is a statistics bar that shows your progress throughout the month. So, keep updated by watching these matrices.
When does my profile gets monetized?
When it comes to growing and harvesting the fruit of efforts, we prioritize mutual growth. Therefore, you don't need to wait for an extended period to monetize or fulfill a specific requirement. We have enabled earning every new profile, either it is a new or older one, either you have one article or hundreds of articles. We pay for each view that you gain from your information. Therefore, have a look at this criterion;
· Your earnings are enabled but would be counted and ready to withdraw after 30 days of publishing. So, for example, if your article is published on the 2nd of August, its payment will be given on the 2nd of next month by counting its paid views.
· The minimum withdrawal balance should be 10 to 15 $. After filling in this criterion, the withdrawal button would be accessible. Note: these criteria might be changed in the future, either decreased or increased.
· The monthly bonus of 10 to 20 $ would be paid to the author of the month. The author of the month would be decided on their performance engagement and activity on article.pk.
How can I withdraw my payment? Where to add payment info?
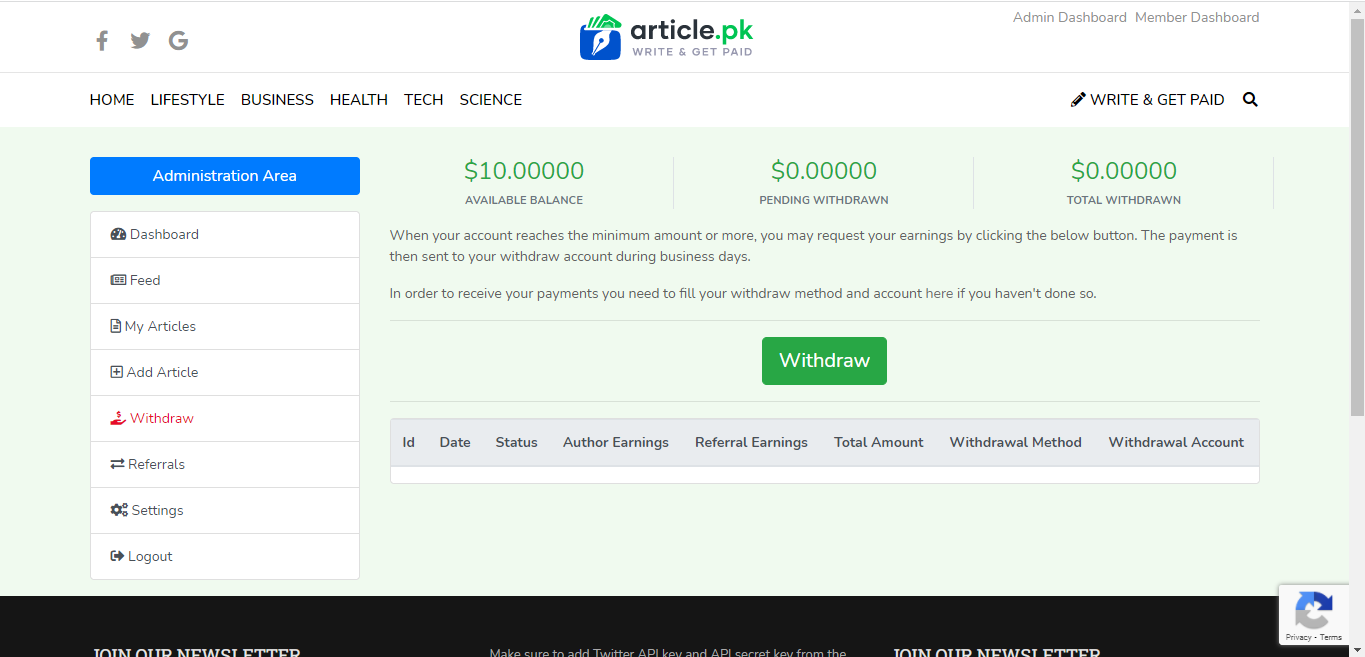
Becoming earning pioneer at article.pk is not rocket science. Just struggle and convert your ideas into earning mediums. So, when you come to harvest the fruit of your struggle, withdrawing payments is more effortless. What you need to do is clicking on withdraws from your dashboard.
In this pane, you get all the details of your earning till that day when you are going to withdraw. Then, there is a green button "withdraw", click on it, and within seconds, payment is on the way to your pocket.
Below this button, you can see the details of your withdrawals with brief categorization and identification of each transaction. It also shows the status of your transactions. But to withdraw your payment, you have to select your payment option in the settings.
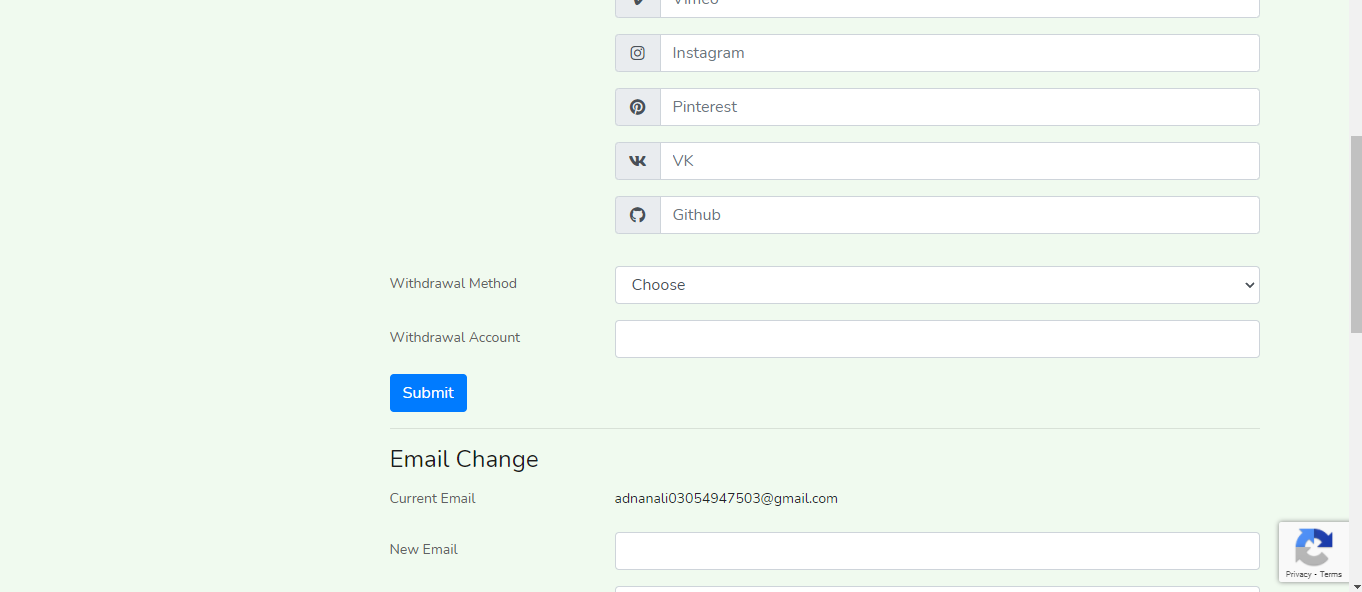
When you scroll down on the settings page, you will see two withdrawal methods and withdrawal account rows. Here you need to choose a medium of transfer and enter the account detail or number below. Once you selected one withdrawal method, all the payments would be sent to that account. You can change it whenever you want by visiting the setting page. We support all types of payment options, including Easypaisa, JazzCash. So, choose which seems to be more comfortable for you.
6. Can I change my profile name and further credentials?
Obviously, you are the sole owner of the information presented in article.pk. Therefore, changing your information is relatively more straightforward. What you need to do is visiting your settings in the dashboard. There you got all the details of your name, profile name, and all the credentials. In case of any problem, you can contact us and submit an issue ticket.